Diffusers, essential-oil hardware, candle-making (non-medical claims). troubleshooting when things go wrong
What should you know before buying Diffusers, essential-oil hardware, candle-making (non-medical claims). troubleshooting whe?
Before buying, use this page as a shortlist and verify the final details on Amazon. Prioritize fit, current price, stock, seller, return window, warranty, and recent buyer feedback over one headline rating. That final check helps avoid stale prices, mismatched variants, and avoidable returns.

By Jordan Nolan · Senior Editor
Published June 1, 2026
Troubleshooting Diffusers, Essential-Oil Hardware, and Candle-Making: When Things Go Wrong
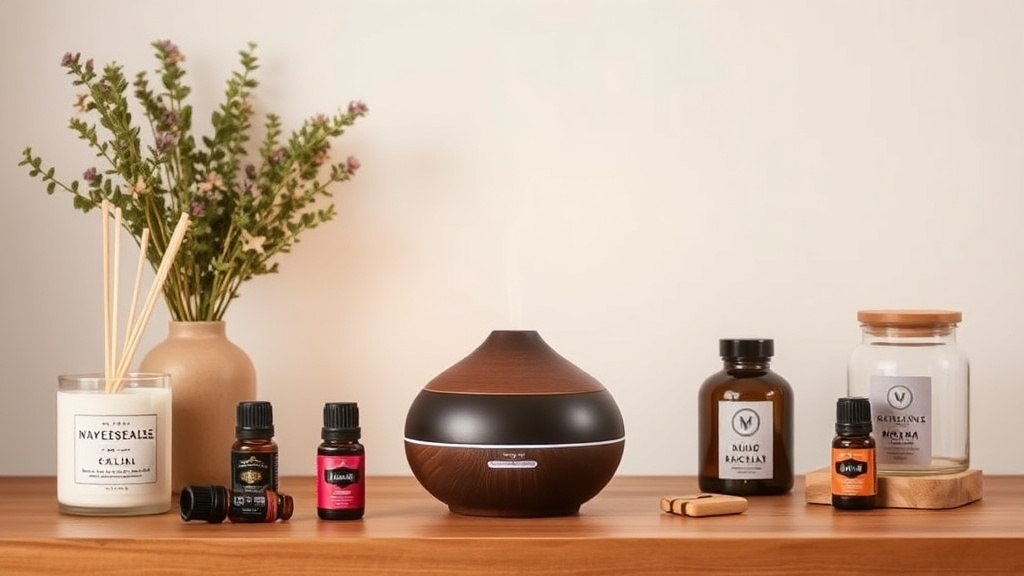
I’ve been working with diffusers, essential oil devices, and candle-making supplies for years, helping countless enthusiasts make the most of their at-home aromatherapy and crafting setup. While these tools are generally straightforward, it’s not uncommon for things to go off track. Maybe your diffuser won’t start, or your candles aren’t burning evenly. I’ve learned a few go-to strategies through trial, error, and testing products firsthand to help you troubleshoot these hiccups — all without ever making health claims or promises, just practical advice to keep your wellness routines flowing smoothly.
In this guide, I’ll walk you through common issues you might encounter with diffusers, essential-oil hardware, and candle-making, and share tips to fix them or prevent them from happening. Since I’ve personally tried many popular devices and supplies, including models like the InnoGear Essential Oil Diffuser - check price on Amazon and the well-reviewed Candle Science Natural Soy Wax - check price on Amazon, I can also recommend reliable products to replace faulty parts, or suggest easier-to-use alternatives if you’re just getting started.
Why Your Diffuser Isn’t Working — Common Problems and Fixes
Diffusers are fantastic for dispersing essential oils into the air, but because they use ultrasonic technology or heat, they can run into issues like not turning on, no mist output, or unusual noises.
-
No power or unit won’t turn on: Double-check that the diffuser is plugged in and the outlet is working. Sometimes the power adapter could be faulty; if your device uses a USB cable, try swapping it out. If the diffuser has a water sensor that disables operation when empty, be sure it has enough water (not exceeding max fill). I never fill past the fill line on the VicTsing Essential Oil Diffuser - check price on Amazon because overfilling simply causes it to shut off.
-
No mist or intermittent mist: If it’s on but not producing mist, the ultrasonic plate or atomizer might be dirty. After unplugging the device, I wipe this gently with a cotton swab dipped in white vinegar or rubbing alcohol to clear mineral buildup. Also, make sure the water you’re using isn’t hard or heavily chlorinated—distilled water often works best to prevent buildup and extend device life.
-
Strange noises or buzzing: This is often a sign of low water or a dirty ultrasonic plate. Cleaning usually solves this, but also confirm that the diffuser is on a flat surface — uneven placement can cause odd sounds.
-
Short mist run-time: Some diffusers have a small water tank and auto shut-off features to avoid damage. But if it stops too quickly, it might be drying out fast or there could be a malfunction. If your usage requires longer bursts, look into diffusers with larger tanks like the URPOWER 500ml Diffuser - check price on Amazon, which gives you hours of continuous mist.
Keeping your diffuser clean and using good quality water are your best bets to avoid the majority of issues. Many models, such as the ASAKUKI Essential Oil Diffuser - check price on Amazon, come with detailed cleaning instructions, so I recommend following those closely.
Essential-Oil Hardware Troubleshooting: Bottles, Caps, and Blending Tools
Essential-oil enthusiasts know that the tools for handling oils—dropper bottles, caps, pipettes, and blending accessories—can be surprisingly finicky sometimes.
-
Oil leaking from the bottle or cap: This usually occurs when bottles aren’t closed tightly or if the dropper or orifice reducer is damaged. I always inspect new bottles for cracks or poorly fitted caps out of the box. My go-to bottles are glass with a high-quality tight screw cap like those from Viva Naturals - check price on Amazon.
-
Droppers clogged or sticking: Essential oils can sometimes crystallize or create residue that clogs the dropper end. If you notice inconsistent drops or difficult suction on a pipette, try soaking it in warm soapy water and then rinsing thoroughly. Be cautious with oils like cinnamon or clove which are thicker or more resinous; some pipettes aren’t rated for those.
-
Cross-contamination mixing scent profiles: If you’re blending oils, ensure you clean any tools between uses to prevent unwanted scent mixing. Use disposable pipettes or dedicated droppers for individual oils to save headaches.
-
Incorrect or inconsistent drops per ml: Different droppers can vary in drop size, which impacts recipe accuracy. When I test recipes for candles or rollers, I always use the same dropper type to keep ratios consistent.
Invest in sturdy glass bottles and good-quality droppers upfront—it avoids most frustration. A set like the Lone Star Oils Glass Bottles with Dropper - check price on Amazon checks most boxes for durability and ease of use.
Candle-Making Challenges: Why Your Candles Might Not Burn Right
Making your own candles is a deeply rewarding craft but comes with a learning curve. I’ve faced—and fixed—my share of candle problems, from uneven burning to scent issues.
-
Tunneling or uneven burn pool: This is when your candle burns a narrow hole down the middle, wasting wax along the sides. It usually means the initial burn wasn’t long enough to melt the wax across the diameter. For wider candles, your first burn should last 2–4 hours to avoid this. The wax type influences this too—in soy wax like Candle Science Natural Soy Wax - check price on Amazon, slower cooling helps create a more even melt pool.
-
Wick problems: mushrooming or too much smoke: Mushrooming (a carbon buildup on the wick tip) happens if the wick is too large for the candle diameter or if additives in fragrance oils make the wick burn hotter. Try trimming your wick to 1/4 inch before each burn. Sometimes replacing the wick with a better fit, such as ECO 10 or 12 for soy containers, can make all the difference.
-
Fragrance not strong enough: If your candles smell weak, the essential oil or fragrance oil percentage may be too low. Most soy waxes have a fragrance load limit around 10%. For stronger scents, make sure you’re using quality fragrance oils like those from Nature’s Garden - check price on Amazon, and that you’re adding fragrance at the right pouring temperature (usually 135-145°F) to help the oil bind to the wax.
-
Wax cracking or frosting: Especially with soy wax, you might notice white frosting on the surface or cracks. This is natural and doesn’t impact performance. However, rapid cooling can worsen cracking. I like pouring at the recommended temps and allowing candles to cure 48-72 hours before burning.
-
Wicks that won’t stay centered: A crooked wick leads to uneven burning. Using wick holders or centering clips that come with many kits helps keep the wick upright while pouring and cooling.
General Tips to Prevent Problems and Extend Hardware Life
While troubleshooting can often fix issues, the best approach is prevention.
-
Keep all hardware clean and dry: Residue buildup causes many problems, whether in diffusers or candle jars. After each use, clean tools with appropriate solutions (vinegar or mild soap for diffuser parts, warm water for pipettes—in case of essential oils, avoid using harsh chemicals outright on glass).
-
Only use recommended oils and waxes: Not all essential oils are created equal, and some can damage diffusers or wick compatibility. Buy high-quality essentials from trusted brands like Plant Therapy - check price on Amazon. Choose waxes that suit your candle style, soy for clean burning or beeswax for longevity.
-
Store oils and wax in cool, dark places: Heat and light degrade oil quality and wax stability.
-
Select hardware sized to your projects: For example, a small diffuser with tiny water tanks will always need more frequent refills. Bigger tanks or stronger ultrasonic models are better for longer sessions.
-
Follow manufacturer instructions diligently: Many devices like the URPOWER 2nd Version Diffuser - check price on Amazon come with clear guidance on water fill, oils amount, and cleaning cycles.
Diffusers, Essential Oil Hardware, and Candle-Making Tools: Compare for Troubleshooting Ease
| Category | Common Issues | Preventive Measures | Recommended Product Example |
|---|---|---|---|
| Diffusers | No mist, power failure, noise | Regular cleaning, use distilled water | InnoGear Essential Oil Diffuser - check price on Amazon |
| Essential Oil Bottles & Droppers | Leakage, clogged droppers | Tight caps, clean with mild soaps, good glass | Lone Star Oils Glass Bottles - check price on Amazon |
| Candle Wick & Wax | Uneven burn, mushrooming wick | Correct wick sizing, taper wicks, proper pouring temp | Candle Science Natural Soy Wax - check price on Amazon |
| Mixing & Blending Tools | Cross contamination, inaccurate dosing | Dedicated tools per oil, consistent droppers | Pump Spray Bottles - check price on Amazon |
| Storage Solutions | Oil degradation, wick damage | Cool dark place, airtight seal | Airtight amber glass bottles (various brands) |
FAQ: Troubleshooting Diffusers and Candle Tools
Q1: How often should I clean my diffuser?
I recommend cleaning your diffuser every 3–5 uses or at least once a week if you use it daily. This keeps mineral deposits and oil residues from clogging the ultrasonic plate, extending its life.
Q2: Can I use any essential oil in my diffuser?
While many essential oils are safe, avoid thick or resinous oils like patchouli or cinnamon in ultrasonic diffusers, as they can clog the mechanism. Also, only use pure oils; synthetic fragrances can damage parts or produce unwanted residues.
Q3: What’s the best wick size for soy candles?
The wick size depends on the candle diameter and wax type. For typical 3-inch diameter soy candles, I often use ECO 10 or ECO 12 cotton wicks. If you’re experimenting, do small test burns to observe performance.
Q4: My candle smoke is too strong and black; what should I do?
Trim your wick to 1/4 inch before every burn. If smoke persists, your wick might be too large or the fragrance load too heavy, causing incomplete combustion. Adjust accordingly.
Q5: Why does my fragrance smell weaker in candles than in diffusers?
Candle scent throw depends on wax type, fragrance load, and cure time. Oils diffuse in the air quicker from a diffuser, but candle scents release gradually as the wax melts. Be patient and experiment with fragrance percentages.
If you’ve been frustrated with your diffuser or candle-making results, I hope these insights help you pinpoint and resolve common setbacks. With some care, quality supplies, and patience, your at-home aromatherapy rituals and candle creations should be a source of warmth and calm—not stress. If you want to explore some of the products I’ve tested and trusted over the years, check out the links sprinkled here—they may just save you a lot of troubleshooting time and provide long-lasting enjoyment.